When it comes to new features in the apps we use every day, it can be hard to keep up. Google Docs is no exception, with new and updated tools being implemented all the time. If you don’t browse the menus to see what’s different, you can easily miss the newly added time-saving features.
To help you be more productive, check out these Google Docs tips that are a little under the radar.
Set up email drafts for Gmail
If you want to write Gmail messages with clarity, you can do so directly in Google Docs. This handy feature is great for emails you want to collaborate on with others who share the document; plus, it keeps a reference to the email in your document.
step 1: Place the cursor in the document where you want to insert the email draft.
Step 2: go insert > building blocks and select email draft from the popup menu.
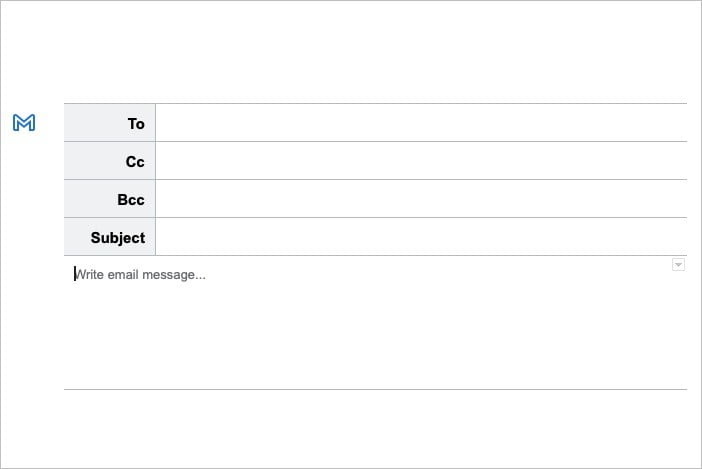
Step 3: Add the email elements you typically need, including To, Cc and Bcc, and a subject line. Then, enter your information in the specified location.
Step 4:choose Mail icon to the left of the template.
This process creates a draft email in Gmail, ready to send. When you’re ready, go to Gmail, log in and select the Drafts folder. You will see your email and you can edit it or send it directly.
In addition to quickly launching your email or collaborating, you can use Google Docs to create multiple Gmail drafts in one place. Then, head over to Gmail and send them all when you’re ready.
Get a head start on meeting minutes
If you plan or join meetings frequently, you’ll love the meeting recording feature in Google Docs. With it, you can create meeting minutes templates using the basics from Google Calendar right in your document. Then, just add notes when the time comes.
step 1: Place the cursor in the document where you want to insert the meeting minutes.
Step 2: go insert > building blocks and select meeting minutes from the popup menu.
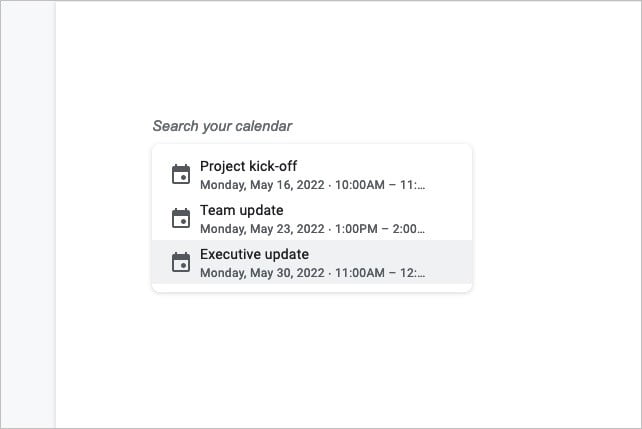
Step 3: In the window that appears, select the Google Calendar event for the meeting.You can also use Search your calendar section to find specific events.
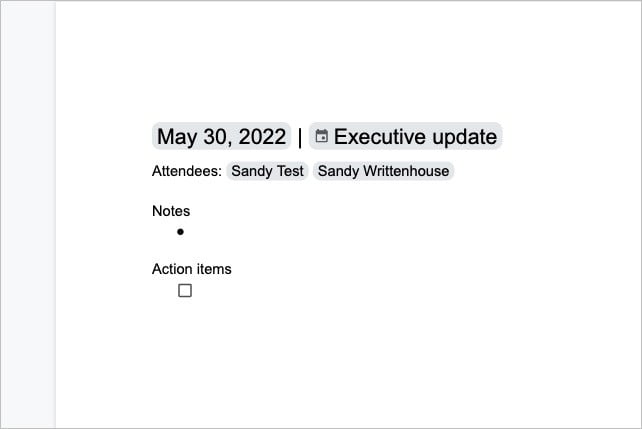
Step 4: You’ll see Docs add a meeting note template with date, title, attendees, and the location of notes and action items.
You can stop looking for meeting minutes templates for Google Docs or other related applications. Just use this handy feature and you’ll always be ready for your next meeting.
Writing and formatting in Markdown
While some places might require you to write in markdown, it might just be one of your favorites. Google Docs helps by letting you write and format documents using Markdown. All you have to do is enable the feature.
step 1: Open a document in Google Docs and select tool from the menu.
Step 2: choose priority in the list.
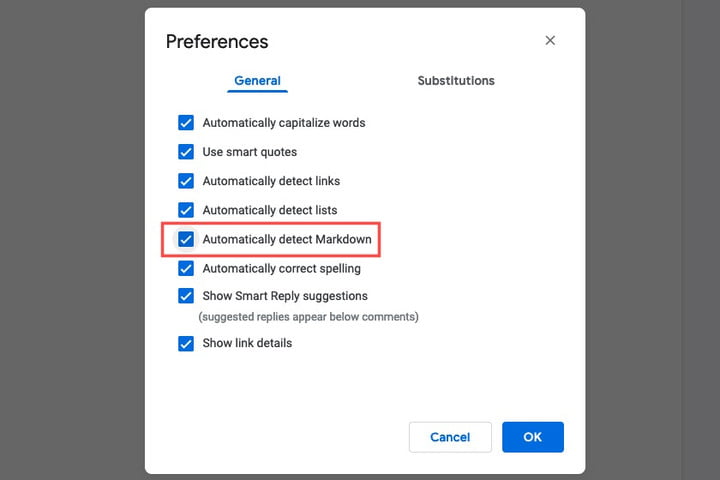
Step 3: go general tab and check the box Automatically detect Markdown.
Step 4: choose OK.
When enabled, you can format documents using Markdown and see text updates immediately. This includes creating headings, formatting text with bold, italics, or strikethrough, and inserting hyperlinks.
Create a dropdown list
Drop-down lists are some of the fastest ways to enter data, answer questions, and make choices in documents. In Google Docs, you can insert preset drop-down lists or create your own drop-down lists in minutes.
step 1: Place the cursor where you want the drop-down list in the document.
Step 2: choose insert > fall from the menu.
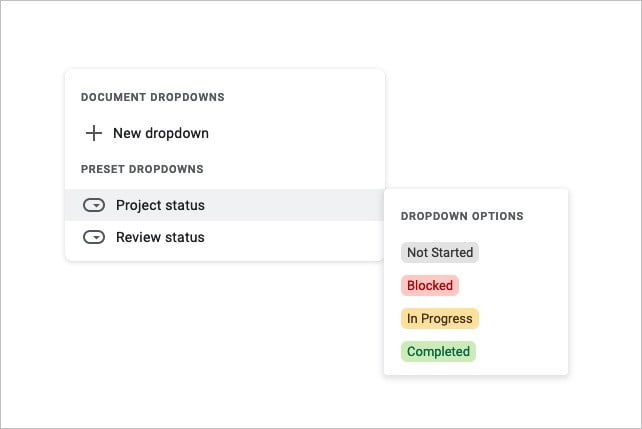
Step 3: In the pop-up window, select a preset drop-down list or create your own drop-down list.
- To see the list options for the preset list, move the cursor to one of them to preview.
- To create your own, add list items, choose colors, and arrange items.

You or your collaborators simply select the dropdown arrow and select an item. Then it pops into your document, just like that!
Insert image or text watermark
Until the end of 2021, one of the only ways to add a watermark to Google Docs is to use the drawing tool. But with Google’s update, you can insert any image or text as a watermark in just a few steps.
Use image watermarks
step 1: choose insert > watermark from the menu.
Step 2: In the watermark sidebar that opens, select picture Tabs and selections Select Image.
Step 3: Find the image you want to use. You can upload a photo from your computer, use the camera, enter a web address, use Google Photos or Drive, or perform a Google Image search.select image and choose insert.
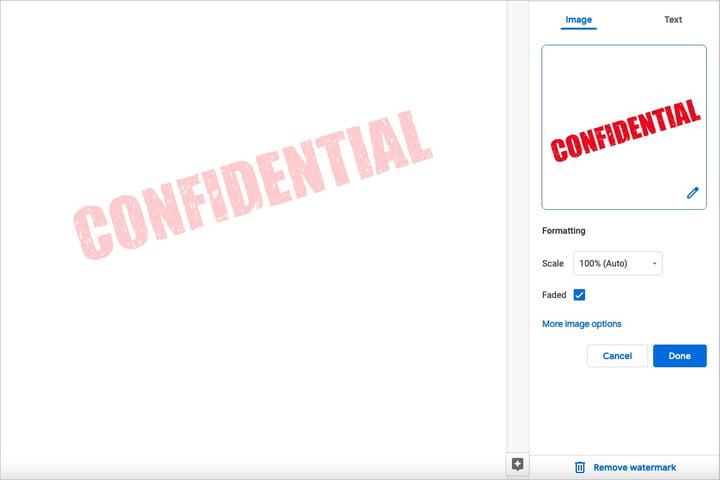
Step 4: The watermark will appear on your document immediately. You can make some minor tweaks in the watermark sidebar if you want.
Under Formatting, choose a percentage scale Image from 50% to 100%.To make the image more transparent, check fade.
Step 5: choose complete when you’re done.
Use text watermarks
step 1: choose insert > watermark from the menu.
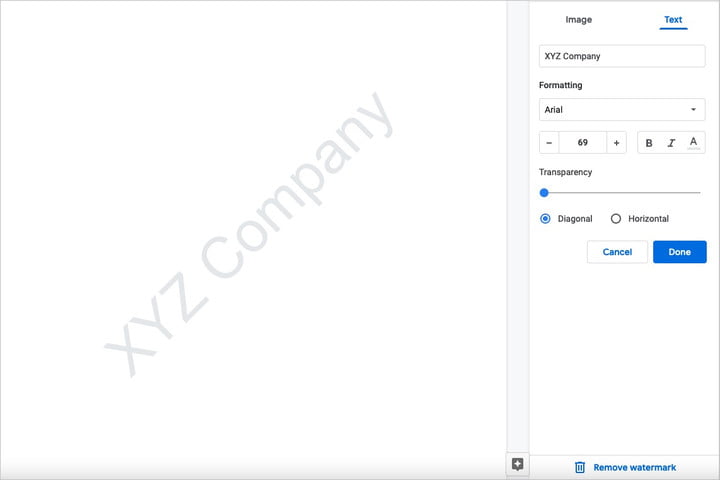
Step 2: In the Watermark sidebar, select text Label.
Step 3: Enter text in the box at the top. You can then adjust it using the other options in the Format section.
- Choose a font style.
- Choose a font size.
- Format the font as bold, italic, or color.
- Adjust transparency.
- Choose a diagonal or horizontal position.
Step 4: choose complete when you’re done.
Inserting an image or text watermark this way is more efficient than creating one with a drawing tool.
Hopefully these tips will help you do more in Google Docs than ever before. For more information, check out How to Use Voice Dictation or How to Create Folders in Google Docs.
Editor’s Choice


